Shadow Of The Tomb Raider - Path Of The Living - LIGHTING
Gameplay lighting of the "Path Of The Living"
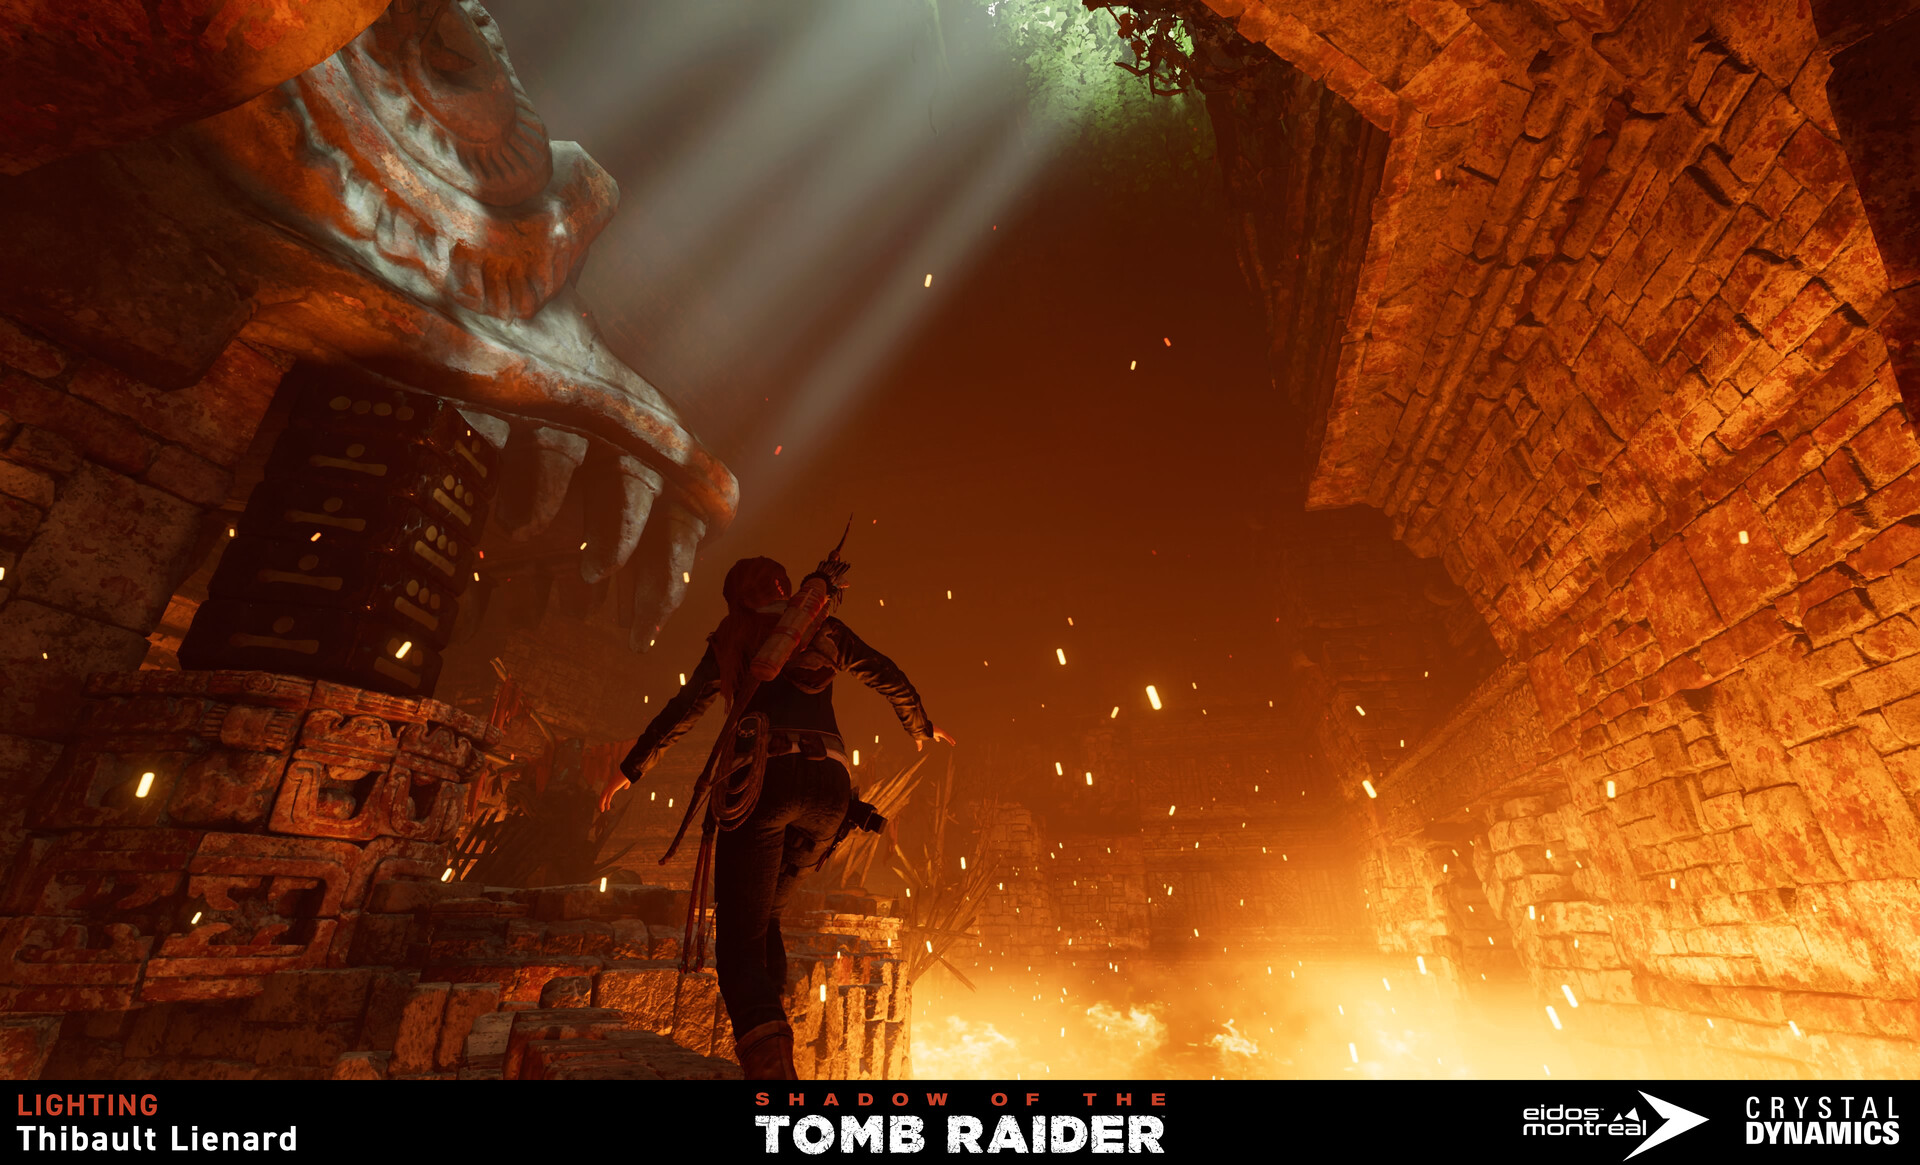
In-game capture on PS4 with photo mode.
This was a big challenge for me as it was the my first time in video games industry. I had to learn the basics/constrains of lighting for video games and learn the engine while still being productive. It was not that easy at first but I had such a good time!
I loved working on The Path Of The Living because it was a mix between dark caves with fire, outside forest with sun light and underwater area.

The view of the temple's door.
You should understand at first sight that it is a dangerous place.
The colder light from the outside hitting the door (the head) makes a good contrast with the fire from bellow.

In this section, I use a dedicated light to accentuate the vines to have a greener result. I think it works well to compliment the orange and adds a bit of a colder feeling to the space.
The fires are very large and intense in this scene. I adjusted the lighting to hit the roof with a lower intensity so the player can have the impression that the room is bigger than it actually is.
You needed to feel the danger all around you

The entrance of the digging site, the path leading to the Temple Of Life's door

I increased the light intensity from the fire at the end of the corridor to better highlight the path and attract the player there.
I also used the artificial light from the lamppost to contrast with the fire.

This section needed to be darker than the previous one. To create a creepy feeling, I used the flashlight of the dead solider on the right to show the small tunnel where you need to go.
You can see a tiny bit of fire lights coming from that tunnel too.

The underwater temple; your way out!
When the player arrives here they need to notice the exit, how to reach that area, and the air pocket all at once.
I used the Depth Of Field to increase and fake the depths of the water.

Underwater corridor.
The entire section needed enough lights to allow the player to see the dangerous piranhas, but still keep a low visibility in-order to have the feeling of pressure, being underwater.
Will you have enough time to reach the surface?

Fighting area before the digging site.

Fighting area before the digging site.